I love you sweetie! You are beautiful, talented, lovely, and amazing in all the ways a person could possibly be. Thank you also for being such an amazing "Mom" and taking care of your four-legged babies!
We Love You!
Me, Dan, Anne, Aster, and Munchie

Friday, November 27, 2009
Monday, November 16, 2009
Weekend Project- DIY Cat Scratcher
Our two cats are great, EXCEPT when they decide to scratch the furniture. I have trained Aster to use the scratch post but no matter how persistent and positive I am with Munchkin, he never shows any interest in using the scratch post. When I catch him scratching the furniture I pick him up, place him in front of the post, tell him he's a "good kitty" and show him what to do by scratching the post myself. He doesn't get it. He always walks off with his tail in the air like I have bored him to death.
I did some research this week on cat scratching issues and found that most scratching products you buy in stores are not tall enough or long enough. In addition, some cats do not like scratching vertically. A light bulb went on when I read this. On Munchkin's first Christmas Elissa had bought him a horizontal cardboard scratcher that contained catnip and he loved it! I refrained from buying another one of these because he kept flipping it over causing catnip to spill everywhere. In short, it was messy.
I checked out some websites and found a DIY cat scratcher that looked easy to make. I found it on http://keetsa.blog.com. Apparently they make organic/green mattresses but they also have a bunch of DIY ideas.
Here's the picture from their site:

Looked easy enough for DJ and I to do!
Materials:
*x-acto knife
*ruler and pencil
*duct tape
*hot glue gun
*fabric
*scissors
We finished the project in about an hour:
Munchkin was already getting excited. Mark three inches from bottom all the way across the cardboard, draw a straight line all the way to the end- this makes cutting easier and so you don't have an uneven spiral.

Cut strips 3 inches wide (make sure you have cardboard underneath what you're cutting so you don't ruin your floors). While DJ cut I rolled the cardboard into a tight spiral- you can see it at the bottom of the picture. I duct taped each end so it would stay tight.

You can make the circle as big as needed. Then, cut fabric strips three inches wide and hot glue them around the outside. We also cut a circle the size of the scratcher and hot glued it on the bottom so that the catnip wouldn't fall out.

Once the scratcher was completed we sprinkled catnip over the top and then shook the scratcher so the catnip settled on the bottom.
Here's the finished product! It looks even BETTER than the store bought one and it's heavier so it won't flip . . .

And the cats LOVE it! Munchkin is hugging it :).


We're hoping this will save our current furniture (ugly as it is) and any nicer furniture we buy in the future! We do not plan on getting them declawed- so this better work!
Catnip makes Munchkin a bit loopy, the video is of his, and Aster's, first experience with the new scratcher:
I did some research this week on cat scratching issues and found that most scratching products you buy in stores are not tall enough or long enough. In addition, some cats do not like scratching vertically. A light bulb went on when I read this. On Munchkin's first Christmas Elissa had bought him a horizontal cardboard scratcher that contained catnip and he loved it! I refrained from buying another one of these because he kept flipping it over causing catnip to spill everywhere. In short, it was messy.
I checked out some websites and found a DIY cat scratcher that looked easy to make. I found it on http://keetsa.blog.com. Apparently they make organic/green mattresses but they also have a bunch of DIY ideas.
Here's the picture from their site:
Looked easy enough for DJ and I to do!
Materials:
*x-acto knife
*ruler and pencil
*duct tape
*hot glue gun
*fabric
*scissors
We finished the project in about an hour:
Munchkin was already getting excited. Mark three inches from bottom all the way across the cardboard, draw a straight line all the way to the end- this makes cutting easier and so you don't have an uneven spiral.

Cut strips 3 inches wide (make sure you have cardboard underneath what you're cutting so you don't ruin your floors). While DJ cut I rolled the cardboard into a tight spiral- you can see it at the bottom of the picture. I duct taped each end so it would stay tight.

You can make the circle as big as needed. Then, cut fabric strips three inches wide and hot glue them around the outside. We also cut a circle the size of the scratcher and hot glued it on the bottom so that the catnip wouldn't fall out.

Once the scratcher was completed we sprinkled catnip over the top and then shook the scratcher so the catnip settled on the bottom.
Here's the finished product! It looks even BETTER than the store bought one and it's heavier so it won't flip . . .

And the cats LOVE it! Munchkin is hugging it :).


We're hoping this will save our current furniture (ugly as it is) and any nicer furniture we buy in the future! We do not plan on getting them declawed- so this better work!
Catnip makes Munchkin a bit loopy, the video is of his, and Aster's, first experience with the new scratcher:
Friday, November 13, 2009
Dreaming in Digital
What do I dream about? A digital SLR! I am ready to go digital. Film for my Minolta SLR is pricey and many stores are no longer processing film. I will keep my film SLR on hand though for when I have access to a darkroom and can shoot in black and white again (someday).
Hopefully I will be able to save up some money once I'm working more and then I will buy one of these:
Nikon D200

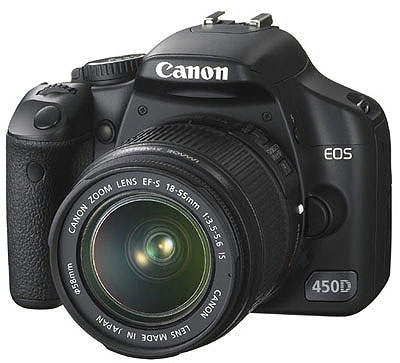
Canon EOS Rebel XSI 450D
I would buy a more professional grade camera but they are a bit out of my price range! Plus, the photograph is only as good as the photographer right?
Here's my current cameras:
My "old school" Minolta

Canon Powershot G5- this one actually belongs to my parents who are letting me use it because my point and shoot Canon died :(

One of these days my dream will come true. In the meantime I'm thankful to have two working cameras to satisfy my photo taking obsession :).
Hopefully I will be able to save up some money once I'm working more and then I will buy one of these:
Nikon D200
Canon EOS Rebel XSI 450D
I would buy a more professional grade camera but they are a bit out of my price range! Plus, the photograph is only as good as the photographer right?
Here's my current cameras:
My "old school" Minolta
Canon Powershot G5- this one actually belongs to my parents who are letting me use it because my point and shoot Canon died :(
One of these days my dream will come true. In the meantime I'm thankful to have two working cameras to satisfy my photo taking obsession :).
Thursday, November 12, 2009
DIY Project
My latest DIY project was recovering my sewing machine seat. Can it be called a project if it took me five minutes?
The seat had no padding so it got quite uncomfortable sitting on it for long sewing projects.
My solution:
Before: Flat seat, funky olive green fabric.


First I layered new fabric, memory foam padding, and the chair seat. Then I pulled the new fabric over the edges and stapled it on with a staple gun.

Ta-da! Brand new seat . . .

with much more cushion!

The Topeka Rental
I debated on whether or not to post these since we seem to move every year! However, I know how much I like looking at photos of peoples' houses, so here's our current home:
Front of House: We're on a corner lot so we have a huge front yard.

Side of House: I spent our first month here pulling up the overgrown landscaping (weeds) next to the house. I also did the brick border, I think it turned out pretty good! Hopefully I'll be able to plant more things in the Spring.

Backyard: We were lucky to find a rental with a fenced yard for the dogs- even though it's half the size of the front yard! It's still big enough for us to play fetch.

Bedroom: The beautiful quilt was made by my Aunt Annette for our wedding. The colors are perfect for Fall.

Office: Also known as the storage room, sewing room, scrap-booking room, guest room . . . If you haven't noticed it's hard to take photographs of the interior of our house because it's so tiny! Half of the office is missing from this picture :).

Bathroom: One of the reasons we chose this rental was that the bathroom is newly remodeled- no dingy tub and tile!

Kitchen: Tiny but functional.

Dining Room: We had to leave our nice big wooden dining table and chairs behind, so we borrowed this collapsible one from my parents. We have to get creative for seating when we eat at it.

Living Room: When we moved we left behind most of our big furniture. We started off watching TV and eating in our office chairs! Now we have places to sit when you come visit. My solution to semi-ugly mismatched furniture was making slipcovers and matching pillowcases. I think they turned out pretty good!

Thanks for looking!
Tuesday, November 10, 2009
Tuesday's Supper- Pepperoni Ziti Casserole
Another good recipe from Taste of Home (and it's healthy)!

Pepperoni Ziti Casserole
10 Servings, Prep: 20 min., Bake: 30 min.
Ingredients
1 package (1 pound) uncooked ziti or small tube pasta
1/2 pound lean ground turkey
2 cans (one 29 ounces, one 8 ounces) tomato sauce, divided
1-1/2 cups (6 ounces) shredded part-skim mozzarella cheese, divided
1 can (8 ounces) mushroom stems and pieces, drained
5 ounces frozen chopped spinach, thawed and squeezed dry
1/2 cup reduced-fat ricotta cheese
4 teaspoons Italian seasoning
2 garlic cloves, minced
1/2 teaspoon garlic powder
1/2 teaspoon crushed red pepper flakes
1/4 teaspoon pepper
1/2 cup water
1 tablespoon grated Parmesan cheese
1-1/2 ounces sliced turkey pepperoni
Directions
Cook pasta according to package directions.
Meanwhile, in a large nonstick skillet, cook turkey over medium heat until no longer pink; drain. Transfer to a large bowl. Add the 29-oz. can tomato sauce, 1 cup mozzarella cheese, mushrooms, spinach, ricotta cheese, Italian seasoning, garlic, garlic powder, pepper flakes and pepper. Drain pasta; fold into turkey mixture.
Transfer to a 13-in. x 9-in. baking dish coated with cooking spray. Combine the water and remaining tomato sauce; pour over pasta mixture. Sprinkle with Parmesan cheese and remaining mozzarella cheese. Top with pepperoni.
Cover and bake at 350° for 24-30 minutes or until bubbly. Uncover; bake 5 minutes longer or until cheese is melted. Yield: 10 servings.
Nutritional Analysis: One serving (1 cup) equals 306 calories, 7 g fat (3 g saturated fat), 37 mg cholesterol, 795 mg sodium, 42 g carbohydrate, 4 g fiber, 20 g protein. Diabetic Exchanges: 2-1/2 starch, 2 lean meat, 1 vegetable.
Friday, November 6, 2009
Chicken Noodle Delight = Comfort Food

I tried out a new recipe from the Taste of Home website. So good!
To make it even healthier I skipped adding the 1/4 tsp. salt, butter, and crackers. I also skipped the baking step and just heated it on the stove. Delicious.
Chicken Noodle Delight
6 Servings, Prep: 25 min., Bake: 40 min.
Ingredients
4 cups uncooked yolk-free noodles
1 can (10-3/4 ounces) reduced-fat reduced-sodium condensed cream of chicken soup, undiluted
4 ounces reduced-fat cream cheese, cubed
1 cup (8 ounces) reduced-fat sour cream
1 cup (8 ounces) plain yogurt
1/4 cup fat-free milk
3 tablespoons minced fresh parsley or 1 tablespoon dried parsley flakes
1 teaspoon onion powder
1/4 teaspoon salt
2 cups cubed cooked chicken breast
1 cup crushed reduced-fat butter-flavored crackers (about 25 crackers)
3 tablespoons reduced-fat butter, melted
Directions
Cook noodles according to package directions. Meanwhile, in a large bowl, combine the soup, cream cheese, sour cream, yogurt, milk, parsley, onion powder and salt. Stir in chicken.
Drain noodles; toss with chicken mixture. Transfer to a 2-qt. baking dish coated with cooking spray.
Combine cracker crumbs and butter; sprinkle over casserole. Bake, uncovered, at 350° for 40-45 minutes or until heated through. Yield: 6 servings.
Nutrition Facts: 1 cup equals 432 calories, 17 g fat (9 g saturated fat), 86 mg cholesterol, 637 mg sodium, 41 g carbohydrate, 2 g fiber, 27 g protein.
Subscribe to:
Posts (Atom)